HomeGuidesValheim
Valheim Workbench: how to build and upgrade WorkbenchLearn how to use and upgrade a Workbench in Valheim
Learn how to use and upgrade a Workbench in Valheim
How do you place and upgrade a Workbench in Valheim?One of the first things you should do inValheimis craft a Workbench, because without it you won’t be able to get much done. But there’s a surprising amount to learn about a Workbench before you can start using it to its full potential. In thisValheim Workbench guidewe’ll swiftly catch you up on how to place and cover a Workbench so you can start using it, as well as how you can upgrade the Workbench later on.
On this page:
Valheim’s Developers Show Us Everything Mistlands Has To OfferEd and Liam recently interviewed the developers of Valheim about Mistlands within Valheim itself.Watch on YouTube
Valheim’s Developers Show Us Everything Mistlands Has To Offer

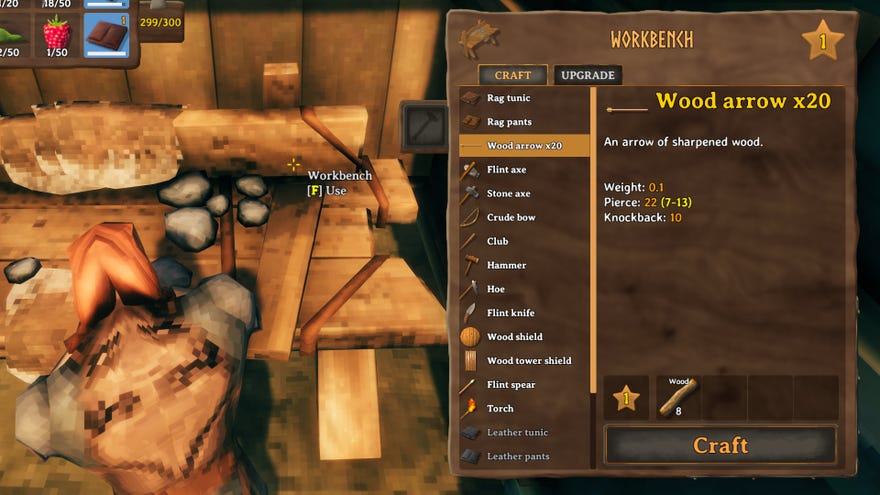
What is a Valheim Workbench?
The Workbench is one of the key devices at your disposal in Valheim. It should be the first thing you craft with your Hammer tool. With a Workbench, you can:
When you place down a Workbench, notice how a circular area around it is highlighted. This is the Workbench’s area of effect, and most building parts can only be placed if you are standing inside this area of effect.
Below we’ll go over how to upgrade a Workbench to unlock more building and upgrade options. But if you’re still struggling to get a Workbench up and running, just skip this section and head down to the sections on how to build and adequately cover a Workbench.
How to upgrade a Workbench in Valheim
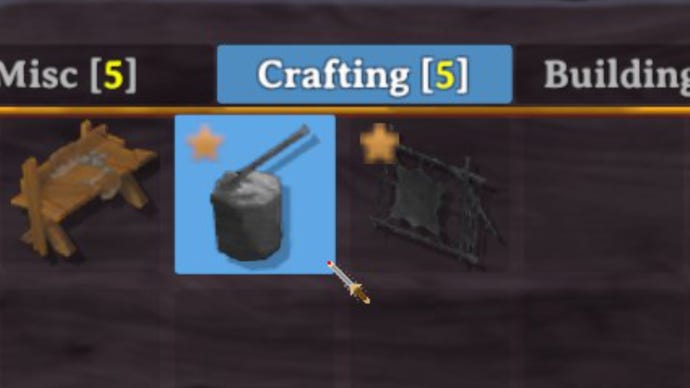
You’ll need to place each one of these buildings very close to the Workbench in order for it to be upgraded. While placing, you’ll seegold sparksconnect the Workbench to the piece you’re placing if it is close enough to take effect.
Placing multiple of the same type of upgrade building won’t have any effect. You’ll need one of each type of upgrade building to upgrade your Workbench to the highest level. These buildings are:
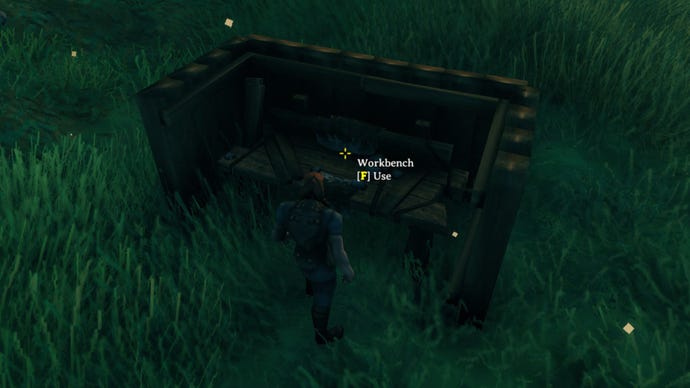
How to build a Workbench in Valheim
But you won’t be able to use this Workbench until it has a roof and is protected from the elements. So let’s discuss the next step.
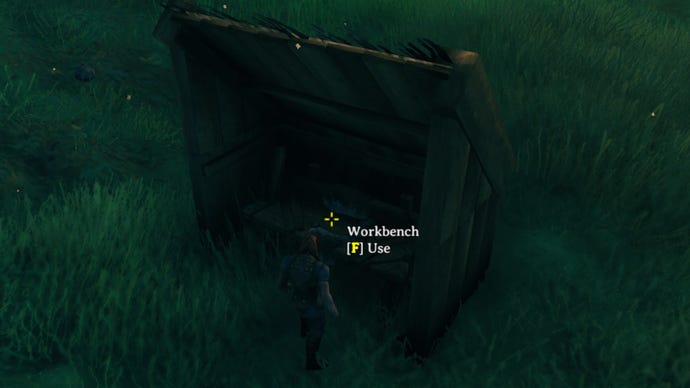
How to cover a Workbench in Valheim
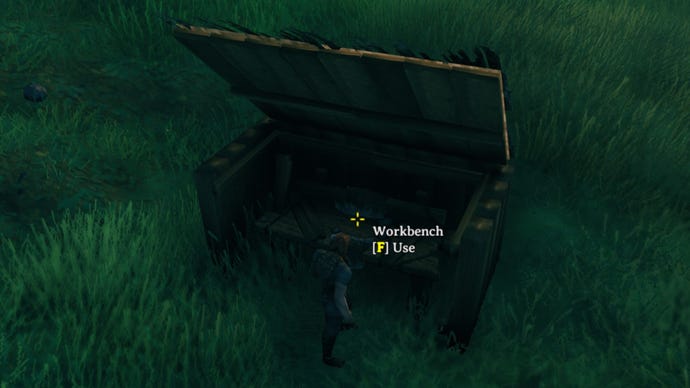
If a Workbench in Valheim is considered open to the elements, then you won’t be able to interact with it. So, you’ll need to cover it and roof it adequately. To do this, you’ll need to gather more wood so you can place walls and roof tiles around and above the Workbench.
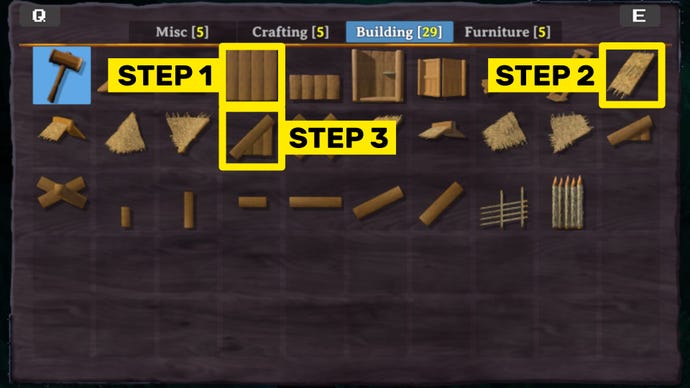
Here’s one simple method for covering a Workbench:
Feel free to consult the below images:
Step 1: 4x Wood Wall tiles
Step 2: 2x 45° Thatched Roof tiles
Step 3: 2x 45° Wood Wall tiles
Here are the exact building parts you’ll need for each of the above steps.
Bear in mind thatif the wind is strong and travelling towards the open part of your Workbenchbuild, then the Workbench still won’t work, so you’ll need to build more wall and roof tiles extending outwards until it is considered fully covered.
And with that, you now know everything there is to know about the Workbench in Valheim! Now why not read our guide onhow to set up a Valheim dedicated serverso you can play with your friends, or our list of all theValheim console commands and cheatson offer?
