HomeGuidesStar Wars Jedi: Survivor
Star Wars Jedi Survivor boss locations: Where to find all Legendary EnemiesLearn where to find every boss in Star Wars Jedi Survivor
Learn where to find every boss in Star Wars Jedi Survivor
Image credit:Rock Paper Shotgun/Electronic Arts
Image credit:Rock Paper Shotgun/Electronic Arts

Want to find every boss and legendary enemy in Star Wars Jedi: Survivor?As you explore the galaxy inStar Wars Jedi: Survivor’s main story, you’ll battle through plenty of bosses that are essential to Cal’s quest. However, you can also find hidden bosses, known as legendary enemies, scattered in secret spots around the galaxy.
In this guide, we’ll break down where to find all hidden bosses and legendary enemies inStar Wars Jedi: Survivor. We’ll also provide a quick list of all main story bosses, so that those looking to just focus on the story can check roughly how far they are through the game.
This guide is packed with spoilers about the various bosses and legendary enemies that you’ll face throughout Star Wars Jedi: Survivor, including those encountered during the main story. You’ve been warned!
On this page:
Best Lightsaber Stances In Star Wars Jedi: SurvivorWhat are the best lightsaber stances in Star Wars Jedi: Survivor? Watch this video to find out.Watch on YouTube
Best Lightsaber Stances In Star Wars Jedi: Survivor

All main story bosses in Star Wars Jedi: Survivor
There are 18 main bosses that you must defeat to complete Star Wars Jedi: Survivor, listed below:
You will encounter these bosses naturally as you progress through the main story, so simply follow those main quest objectives to fight them.
If you’re after hidden bosses, Coruscant, Koboh, and Jedha each have a bunch of legendary enemies to find in secret areas. Keep scrolling to learn where to find all legendary enemies and hidden bosses in Star Wars Jedi: Survivor.
All Coruscant hidden bosses
Image credit:Rock Paper Shotgun/Electronic Arts
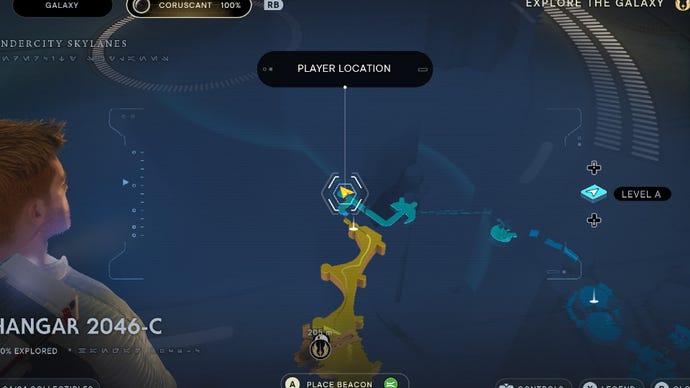
D-L1T - Hangar 2046 (requires Electro-Dart)
To findD-L1T, start at the Hangar 2046 Meditation Point on Coruscant. Run straight ahead after spawning and use the lift. At the top, continue around the bend, turn left, and use an Electro-Dart to open the door.
Image credit:Rock Paper Shotgun/Electronic Arts
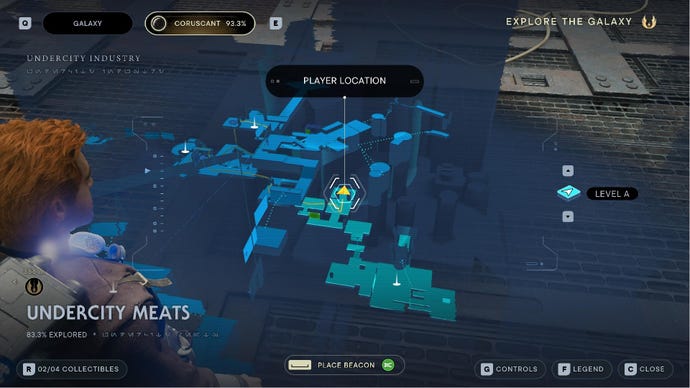
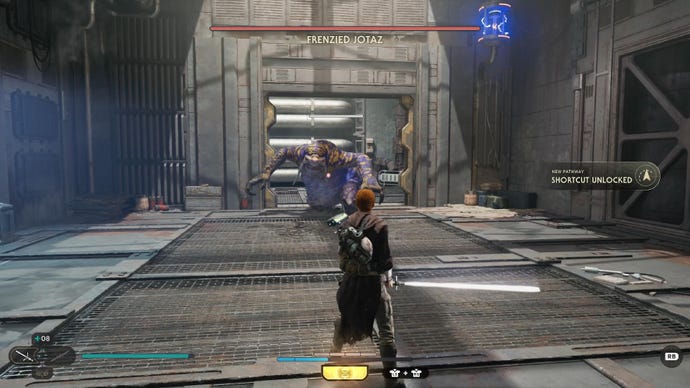
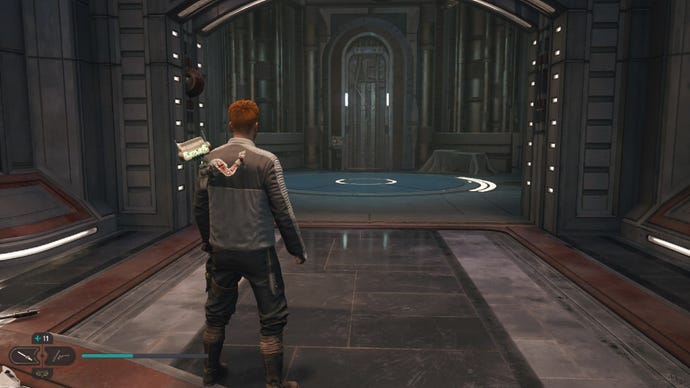
Frenzied Jotaz - Undercity Meats (requires Electro-Dart)
To find theFrenzied Jotaz, fast travel to the Undercity Meats Meditation Point on Coruscant. Run straight ahead and grapple up along the main path to the ledge where meat is being moved around on an overhead conveyor belt.
Turn left and head through the door, and then take a right to find a shaking door. Use BD-1’s Electro-Dart to open this door and fight the Frenzied Jotaz.
All Koboh hidden bosses
Image credit:Rock Paper Shotgun/Electronic Arts
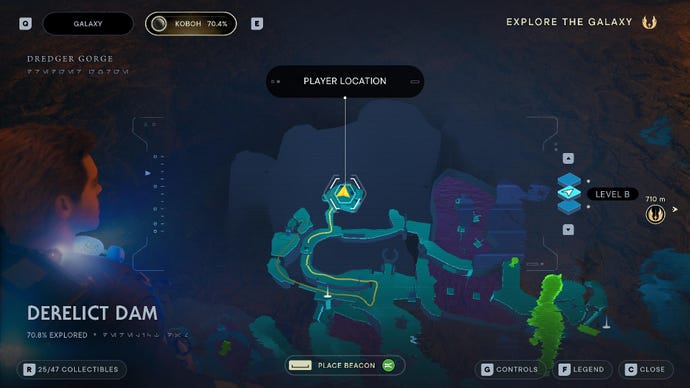
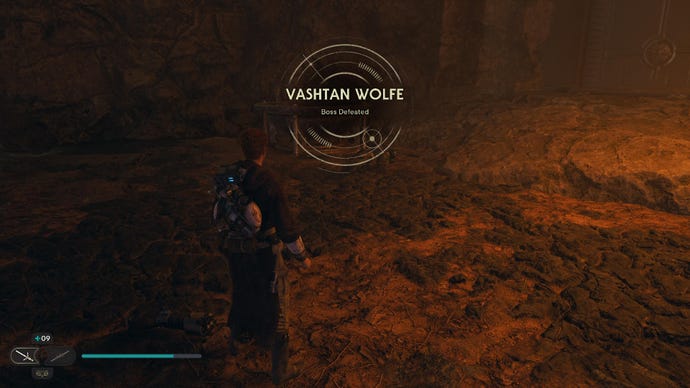
Vashtan Wolfe - Derelict Dam (requires Electro-Dart)
To fightVashtan Wolfe, you must get the Electro-Dart ability from later in the story and then return to their lair in Derelict Dam. From the Derelict Dam Meditation Point, take the cave tunnel around the corner and follow it along until you climb the ledge. You’ll findVashtan Wolfe’s lairjust ahead.
Image credit:Rock Paper Shotgun/Electronic Arts

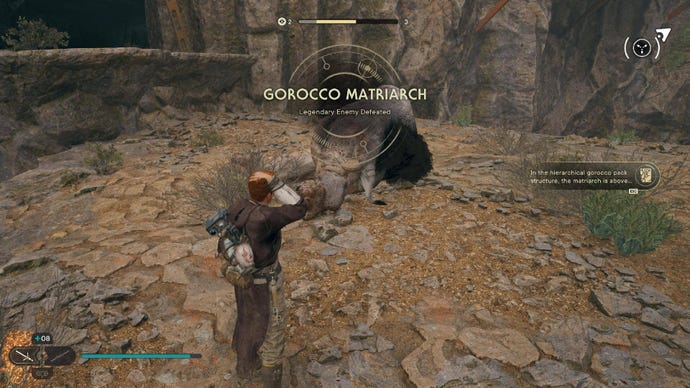
Gorocco Matriarch - Derelict Dam (requires Force Lift/Slam)
To find theGorocco Matriarch, head to Derelict Dam and use a Roller Mine to destroy the wall on the path below the Workbench. Then, pass through the broken wall, follow the path around to the left, and climb the rope.
Image credit:Rock Paper Shotgun/Electronic Arts
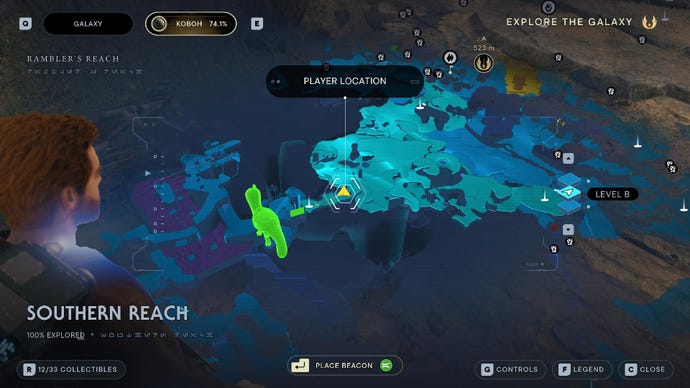
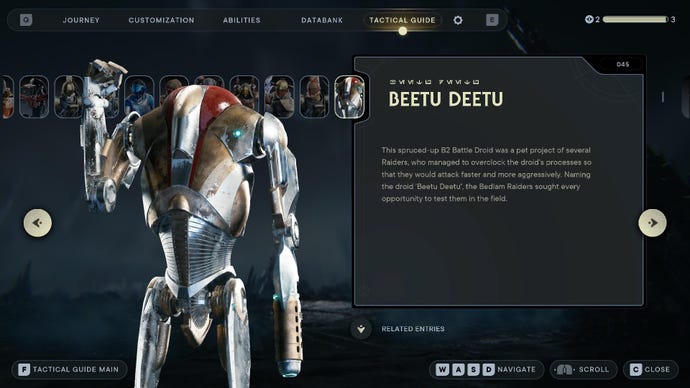
Beetu Deetu - Southern Reach
Beetu Deetuis a legendary Super Battle Droid that you can sometimes encounter just past the Southern Reach Meditation Point. As you head up the path, a pod can drop from the sky on the path ahead. When it opens, Beetu Deetu will stroll out and start a fight.
The caveat here is that Beetu Deetu won’t always spawn, so you’ll need to keep resting at the Southern Reach Meditation Point to reset enemy spawns until they appear.
Image credit:Rock Paper Shotgun/Electronic Arts
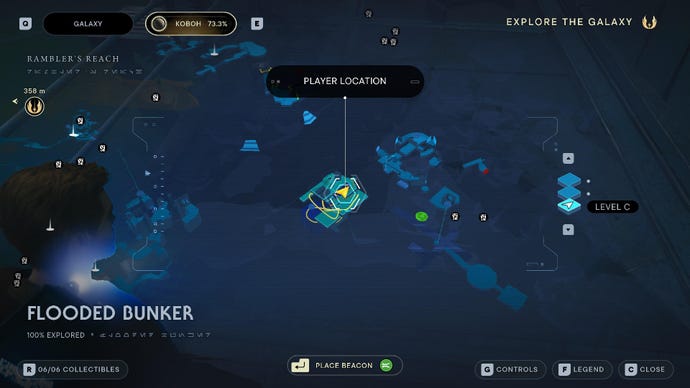
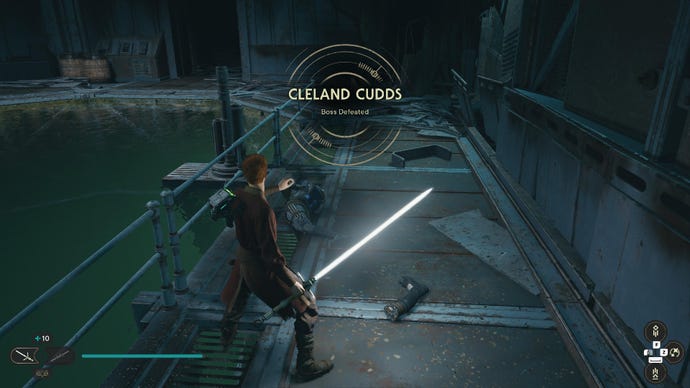
Cleland Cudds - Flooded Bunker (requires Force Lift/Slam)
Underground, you’ll find an underwater passage that you can swim through to delve deeper into the Flooded Bunker. Shortly after emerging on the other side,Cleland Cuddswill ambush you and start this boss battle.
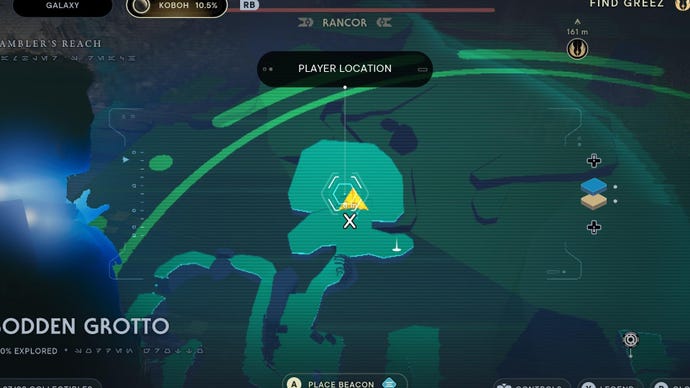
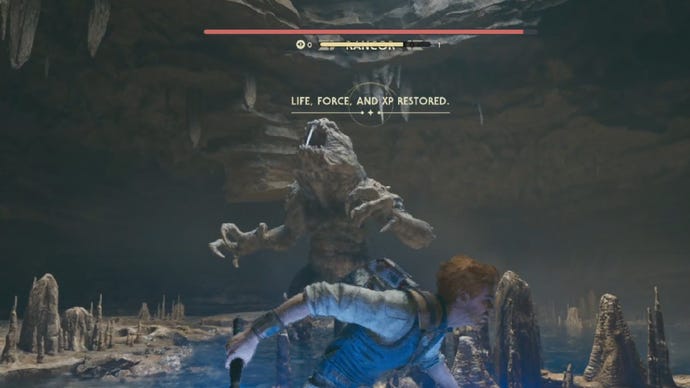
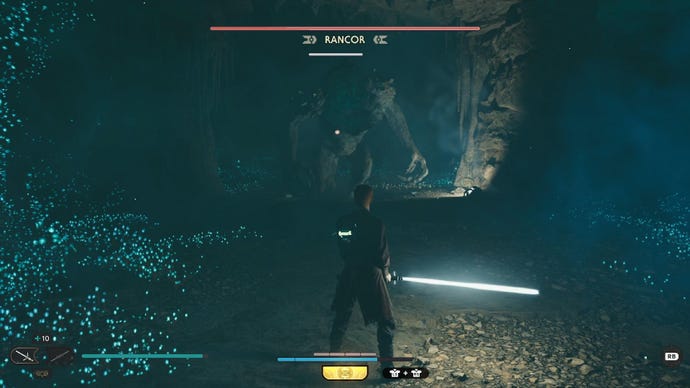
Rancor - Sodden Grotto
Head into Sodden Grotto and follow the path around to the end. It’s fairly linear, and once you reach the final area, you can drop into the Rancor’s chamber to start this boss fight.
This is a tough fight, especially early on, so take a look at our guide onhow to beat the Rancor in Star Wars Jedi: Survivorfor some handy tips.
Image credit:Rock Paper Shotgun/Electronic Arts
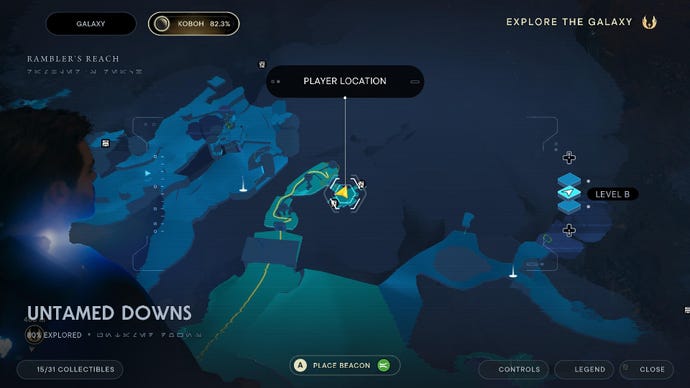

E3-VE3 - Untamed Downs (requires Merrin’s Charm and Force Lift/Slam)
Past the green laser door, follow the path around and use Force Lift to open the door on your right. On the other side, you’ll find a few B1 Battle Droids andE3-VE3, a Droideka legendary enemy.
Image credit:Rock Paper Shotgun/Electronic Arts
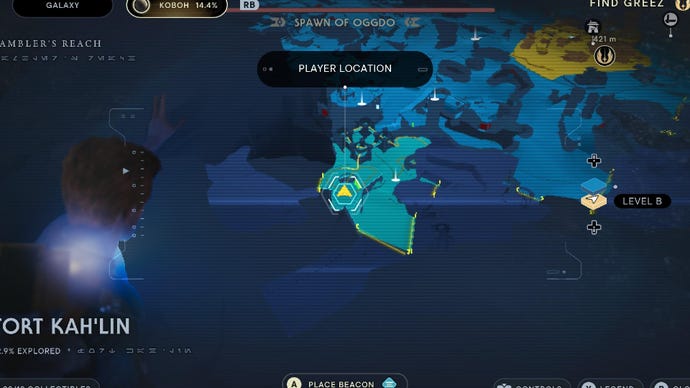
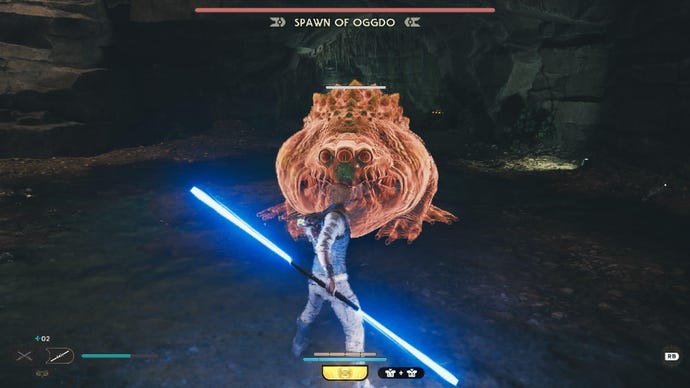
Spawn of Oggdo - Fort Kah’Lin
Spawn of Oggdois Jedi: Survivor’s answer to the infamous Oggdo Bogdo boss fight from 2019’s Fallen Order. Spawn of Oggdo is found in Fort Kah’Lin, and can be challenged on your first trip to Koboh.
To fight Spawn of Oggdo, simply walk onto the circle door. It’ll open as soon as you reach the center, causing you to fall into a pit in which you’ll find Spawn of Oggdo.
Image credit:Rock Paper Shotgun/Electronic Arts
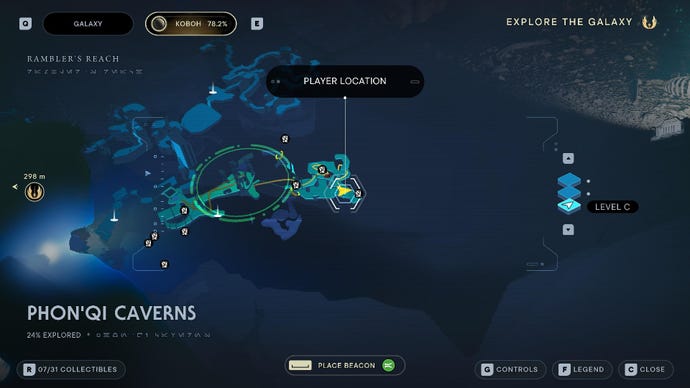
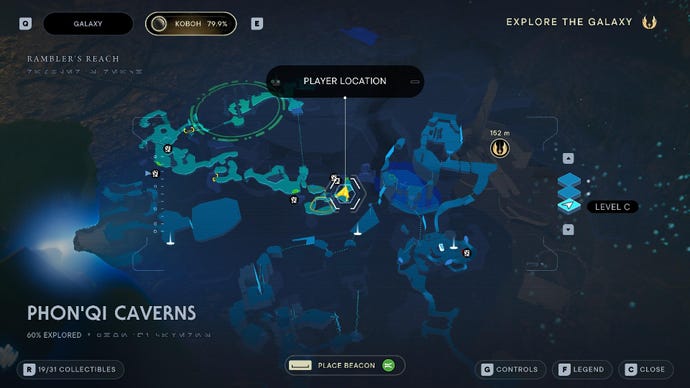
Rancor - Phon’Qi Caverns (requires Force Lift/Slam)
If you thought that first Rancor boss fight was tough, then you’re in luck - there’s another one! ThisRancoris found in Phon’Qi Caverns, a cave found in the cellar beneath the abandoned shack in Foothill Falls.
Head into the basement using the cellar door outside of the abandoned shack, and then squeeze through the gap to enter Phon’Qi Caverns. Follow the path around and use Force Lift to raise the object out of the hole, allowing you to delve deeper into the cave.
Continuing along this path, you’ll be able to drop even deeper into the cave from a ledge near three laser turrets. Drop down to find the Rancor boss hidden in the pit below.
Image credit:Rock Paper Shotgun/Electronic Arts
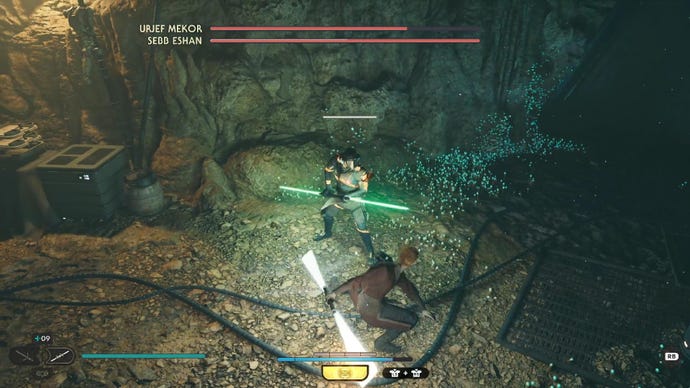
Erjef Mekor, Sebb Eshan and “Prince” Patren - Phon’Qi Caverns (requires Force Lift/Slam)
Further into Phon’Qi Caverns, you’ll find yourself trapped between two forcefields, before the floor collapses and plunges you further into the caverns below. Here, follow the path through the electrified gates to reach a chamber in which a trio of bosses namedErjef Makor, Sebb Eshan, and “Prince” Patrenwill team up to fight you.
Image credit:Rock Paper Shotgun/Electronic Arts
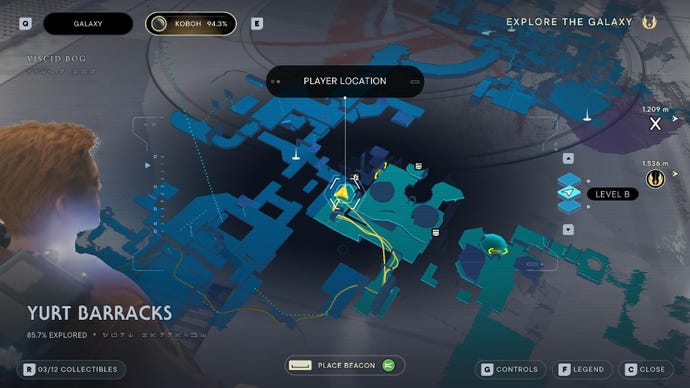

The Massiff - Yurt Barracks (requires Force Lift/Slam)
At the top, turn back and Dash across the gap to reach the locked door. Use Force Lift to unlock the door, and then pass through to start The Massiff boss fight.
Image credit:Rock Paper Shotgun/Electronic Arts
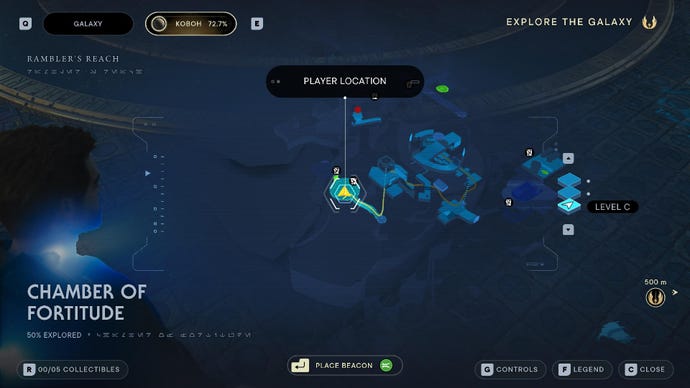
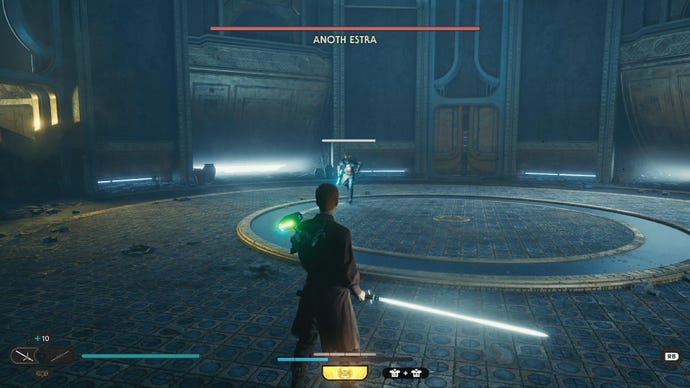
Anoth Estra - Chamber of Fortitude (requires Force Lift/Slam)
Anoth Estrais found in the Chamber of Fortitude, a hidden High Republic structure beneath the Corroded Silo in Rambler’s Reach. To enter, you must climb to the roof of the Corroded Silo and use Force Lift to remove a grate, allowing you to drop inside.
Follow the path around and zipline across, and then take the lift down towards some enemies. Defeat them, and then parkour across the large gap to reach the High Republic cube up ahead. Take the lift down, and you’ll find Anoth Estra within the first room of the Chamber of Fortitude.
Image credit:Rock Paper Shotgun/Electronic Arts
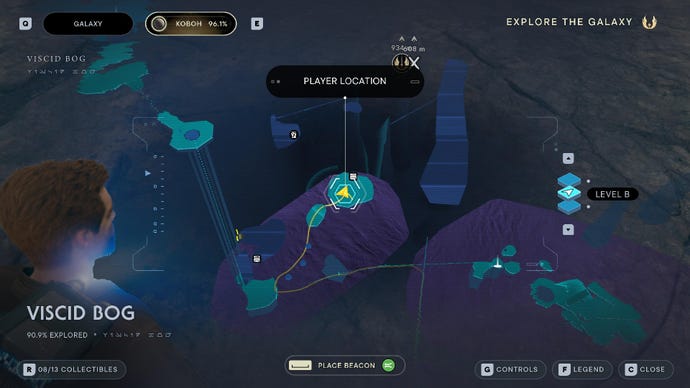
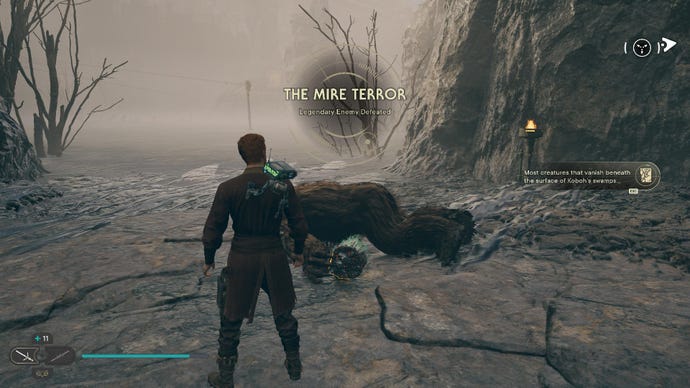
The Mire Terror - Viscid Bog (requires Force Lift/Slam)
At the top, turn back and Force Lift the platforms out of the swamp and leap across. Continue ahead and leap down to the platform below to fight The Mire Terror, which is actually a pair of Mogus.
Image credit:Rock Paper Shotgun/Electronic Arts
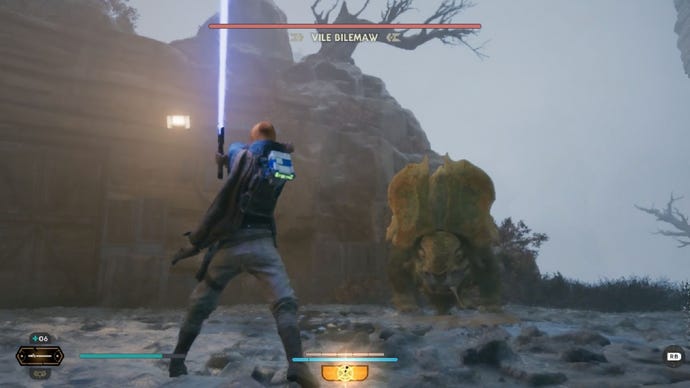
Vile Bilemaw - Fogged Expanse
To find theVile Bilemaw, head to the Fogged Expanse Meditation Point. From there, use the zipline straight ahead and then turn left. There’s a gap you can leap across here, but turn back on the other side and keep hopping down to the platforms below.
After leaping down a few platforms, you’ll find a slope that you can slide down. As you slide, get ready to fight, because you’ll find the Vile Bilemaw boss at the bottom.
All Jedha hidden bosses
Image credit:Rock Paper Shotgun/Electronic Arts

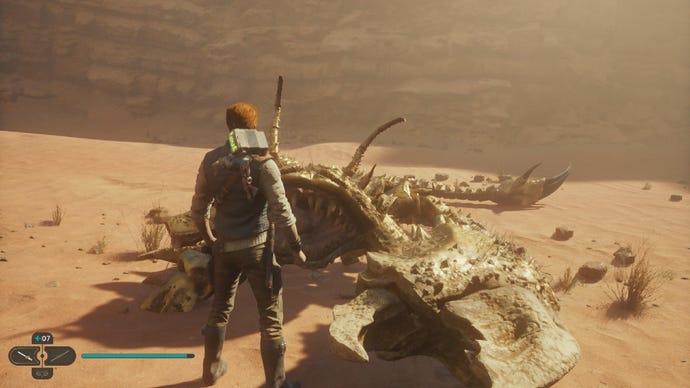
Golden Skriton - Desert Ridge
Image credit:Rock Paper Shotgun/Electronic Arts

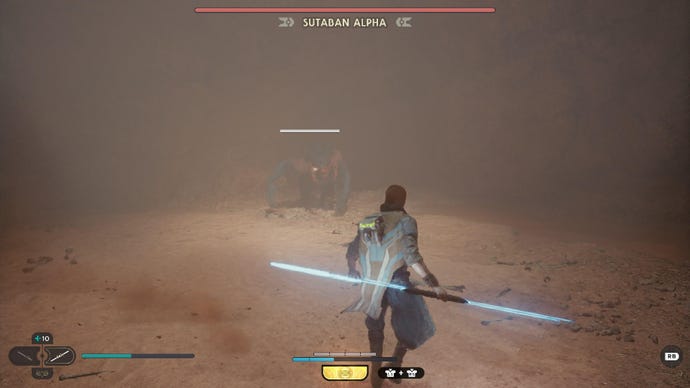
Sutaban Alpha - Crypt of Uhrma
Continue up the path, passing through the waterfall, and squeeze through the gap ahead. As you emerge on the other side, you’ll enter the Sutaban Alpha’s boss arena.
That wraps up our guide on where to find all legendary enemies and hidden bosses in Star Wars Jedi: Survivor. If you’re hoping to 100% the game, check out our guides onwhere to find all collectibles on Koboh,Jedha, theShattered Moon, andNova Garon.
