HomeGuidesKena: Bridge of Spirits
Kena: Bridge Of Spirits bosses: all 16 boss fights in order and how to beat them on MasterHere are all of the bosses you’ll encounter in Kena: Bridge Of Spirits
Here are all of the bosses you’ll encounter in Kena: Bridge Of Spirits
Want to learn about all the boss fights in Kena: Bridge Of Spirits?There is a grand total of 16 boss fights (that is, fights with big boss health bars at the top) in Kena: Bridge Of Spirits - and like everything else in Ember Lab’s marvellous action-adventure game, each one offers some true spectacle. If you’re looking for a list of all the boss fights and some advice on how to beat each one, you’ve come to the right place.
Keep scrolling to check outall 16 bosses in Kena: Bridge Of Spirits. I’ve also included footage of myself beating each boss onMaster Spirit Guide difficulty.
The Rot Are The Cutest (And Useful) | My Fav Thing In… (Kena Bridge Of Spirits Review)Watch on YouTube
The Rot Are The Cutest (And Useful) | My Fav Thing In… (Kena Bridge Of Spirits Review)

Obviously, major spoilers follow. You’ve been warned.
Kena: Bridge Of Spirits boss fights: all 16 bosses in order
Including both minibosses and true story bosses, there are 16 boss fights in Kena: Bridge Of Spirits. Each one comes equipped with a variety of different attack patterns that you’ll likely need to study before you can effectively defeat them - as long as you’re playing on the higher difficulties, anyway.
Let’s take a look at all of the boss fights in order from the start to the end of the game, when you’ll meet them, and how to defeat them. Also check out the videos, because they’ll show you how I defeated each boss on Master level.
Kena: Bridge Of Spirits: Sprout boss fight (Master difficulty)Watch on YouTube
Kena: Bridge Of Spirits: Sprout boss fight (Master difficulty)

Sprout boss fight walkthrough
The Sprout is the first boss you’ll encounter in Kena: Bridge Of Spirits. You’ll find him at the end of the tutorial section, and you’ll likely also find that he doesn’t put up a terribly strong challenge. His attacks are all very slow one-or-two-hit combos that are easily dodged or parried, and he is very weak to you using your Rot Action to stun and distract him. This boss fight is over before you know it.
Kena: Bridge Of Spirits: Kappa boss fight (Master difficulty)Watch on YouTube
Kena: Bridge Of Spirits: Kappa boss fight (Master difficulty)

Kappa boss fight walkthrough
Kena: Bridge Of Spirits: Wood Knight boss fight (Master difficulty)Watch on YouTube
Kena: Bridge Of Spirits: Wood Knight boss fight (Master difficulty)

Wood Knight boss fight walkthrough
The Wood Knight is the first true boss fight of Kena: Bridge Of Spirits, and can be found guarding Rusu’s house. Deal with all the javelin-throwing Branch-Tosser enemies and the Wood Knight will appear, wielding a massive chunk of wood as a club. This boss loves winding up massive attacks and combos that you’ll need to be careful to parry or avoid, because they’ll very quickly drain your block meter. Distract him with your Rot and use your Bow to destroy the orange crystals poking out of its body to speed up this dangerous fight.
Kena: Bridge Of Spirits: Sprout Captain boss fight (Master difficulty)Watch on YouTube
Kena: Bridge Of Spirits: Sprout Captain boss fight (Master difficulty)

Sprout Captain boss fight walkthrough
Once you restore the four Ancient Shrines (theFishing Shrinecan be a little confusing), you’ll need to return to the Guardian Tree to open it up.Insideis the Sprout Captain - an upgrade from the lowly first boss, this time equipped with two blades and a series of flurry attack combos that can quickly wear you down. It’s best to learn how to parry for this fight, because it can be difficult to keep dodging and blocking these attacks in quick succession.
Kena: Bridge Of Spirits: Mage boss fight (Master difficulty)Watch on YouTube
Kena: Bridge Of Spirits: Mage boss fight (Master difficulty)

Mage boss fight walkthrough
Coming hot on the heels of the previous boss fight, a Mage appears at the entrance to the Lantern Cavern to which you must head after opening the Guardian Tree. This Mage has a couple of annoying tricks up its sleeve, such as the ability to summon minions and heal itself, but in reality it’s quite the pushover. Save one of your Rot Actions for when it attempts to heal, and halt it in its tracks with a Rot Hammer or Rot Infused Arrow attack. To learn more about these and other powers, check out ourKena: Bridge Of Spirits abilities and upgradeswalkthrough.
Kena: Bridge Of Spirits: Shrine Guardian boss fight (Master difficulty)Watch on YouTube
Kena: Bridge Of Spirits: Shrine Guardian boss fight (Master difficulty)

Shrine Guardian boss fight walkthrough
The good news is that just like the Wood Knight you can target the orange crystals on its body to chunk its health down faster, and when it does the ground root attack, the Deadzone Heart on its back opens up, allowing you to target it with your Rot and pulse to destroy it, dealing even more damage. Take your time with this fight, it’s trickier than you might think.
Kena: Bridge Of Spirits: Corrupt Taro boss fight (Master difficulty)Watch on YouTube
Kena: Bridge Of Spirits: Corrupt Taro boss fight (Master difficulty)

Corrupt Taro boss fight walkthrough
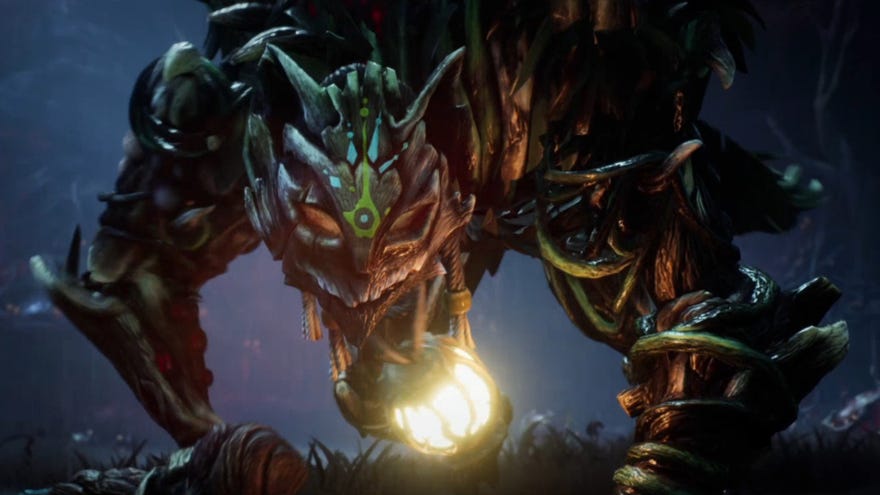
The first “act” of Kena: Bridge Of Spiritstasks you with helping the spirit of Taro, the brother of twins Beni and Saiya who you meet in the tutorial. Before Taro’s spirit can move on, you must defeat Corrupt Taro - a hulking, menacing werewolf-like boss which has an array of dangerous attacks and goes through two phases - first with a sword, and then with just claws. Watch out in particular for when Corrupt Taro starts to circle you in the second phase, because when he runs at you you’ll need to time the dodge just right or the boss will pick you up and squeeze you (as part of an unblockable attack, I might add), dealing massive damage.
Kena: Bridge Of Spirits: Vine Knight boss fight (Master difficulty)Watch on YouTube
Kena: Bridge Of Spirits: Vine Knight boss fight (Master difficulty)

Vine Knight boss fight walkthrough
Kena: Bridge Of Spirits: Stone Guardian boss fight (Master difficulty)Watch on YouTube
Kena: Bridge Of Spirits: Stone Guardian boss fight (Master difficulty)

Stone Guardian boss fight walkthrough
And just like with the Shrine Guardian, save a Rot Action for when the Stone Guardian does its reaching-into-the-ground attack, because you can target the Deadzone Heart on its back and detonate it for tonnes of damage. I’d also recommend unlocking the Parry Courage upgrade, so that when you parry the smaller enemies you gain Rot Actions which you can use for Rot Hammer attacks against the Stone Guardian.
Kena: Bridge Of Spirits: Rot Eater boss fight (Master difficulty)Watch on YouTube
Kena: Bridge Of Spirits: Rot Eater boss fight (Master difficulty)

Rot Eater boss fight walkthrough
The Rot Eater can be found deep in the Village Heart cave, in a circular room filled - at first - with Moths and Lizard enemies. The Rot Eater itself is a larger version of those lizards, but it’s not terribly dangerous as boss fights go. When it raises its head and its neck turns red, shoot it with an arrow to interrupt the attack and deal a big chunk of damage. Everything else is very ordinary in this fight - there are some basic swipe attacks, some summoning of smaller enemies… You know the drill.
Kena: Bridge Of Spirits: Corrupt Woodsmith boss fight (Master difficulty)Watch on YouTube
Kena: Bridge Of Spirits: Corrupt Woodsmith boss fight (Master difficulty)

Corrupt Woodsmith boss fight walkthrough
Just as Taro’s corrupted form needed to be vanquished before his spirit could be freed, so too must you face the Corrupt Woodsmith in order to free Adira. The big hint of this fight is the glowing link between the Woodsmith and the central stone monolith guarding the Village Heart. Turns out the Woodsmith is invulnerable unless you use a Spirit Bomb to open the monolith up and shoot the Heart 3 times. Doing this makes the Woodsmith vulnerable for a short while. After that she’ll slam the monolith a few times to fix it (creating shockwaves you must jump over), and the whole sequence starts over.
At half health, the monolith will be destroyed, and things turn into a more regular 1v1 boss fight. She’ll throw bolas of fire at you, and there’ll be more shockwaves to jump over. On Expert and Master difficulty every little attack hurts a lot, so take care and take your time with this fight, because it’s one of the more dangerous fights in the game.
Kena: Bridge Of Spirits: Mask Maker boss fight (Master difficulty)Watch on YouTube
Kena: Bridge Of Spirits: Mask Maker boss fight (Master difficulty)

Mask Maker boss fight walkthrough
There are three paths that must be followed and their bosses defeated before you can confront Toshi - the leader of the Village. The path west from the Mask Shrine takes you down the Mask Maker path, and after placing someincense potson the correct plinths (look at the faces on the pots/plinths!) you’ll face the Mask Maker himself.
The Mask Maker has a fan of teleporting from place to place, which makes it difficult to wind up big attacks like the Rot Hammer against him. Instead you must stay vigilant for his sword attacks that come from nowhere, and pick your moments while he’s winding up attacks of his own in order to interrupt him with a Rot Action and deal some real damage.
Kena: Bridge Of Spirits: Hunter boss fight (Master difficulty)Watch on YouTube
Kena: Bridge Of Spirits: Hunter boss fight (Master difficulty)

Hunter boss fight walkthrough
The Hunteris at the end of the south-east path of the Village, and she’s a nightmare to deal with. She stays in the air near-constantly, raining arrows down and dodging your own arrows unless you time them carefully. After enough damage she’ll fall to the ground for a short time, where you can whale away at her until she decides to do something other than sit there taking damage.
Kena: Bridge Of Spirits: Warrior boss fight (Master difficulty)Watch on YouTube
Kena: Bridge Of Spirits: Warrior boss fight (Master difficulty)

Warrior boss fight walkthrough
Of all the fights in Kena: Bridge Of Spirits, this one feels the most like a Sekiro fight. The Warrior guards the watery south-west path of the Village, and he wields a large glowing glaive which he’ll thrust and spin at you while mixing up his timings - some attacks fast, and some slow, to try and upset your rhythm.
As with the Hunter, the Warrior will sometimes unleash a shockwave barrier attack which you must Spirit Dash through to avoid damage. And watch out for his quick swipe attack while in melee - the red symbols you see just beforehand indicate that it’s another unblockable attack that you must dodge or pay for in massive amounts of your health.
Kena: Bridge Of Spirits: Corrupt Toshi boss fight (Master difficulty)Watch on YouTube
Kena: Bridge Of Spirits: Corrupt Toshi boss fight (Master difficulty)

Corrupt Toshi boss fight walkthrough
At last, it is time to face Toshi, the corrupted leader of the Village - and hopefully it goes better than last time. This is my favourite boss fight of them all. Toshi uses his staff to send out more shockwaves that you must Spirit Dash through, and with his sword he can unleash long combos of sweeping fire attacks that you must basically learn to parry or continually dodge, or else.
His attacks borrow from the three previous bosses, so there’s a lot of different patterns to learn and prepare for in this extended penultimate fight. One tip I found extremely useful: make sure before you start this fight you have the Rot Infused Spirit Bomb ability upgrade, because it will slow Toshi to a halt for a short while, allowing you to safely get some extra attacks in.
Kena: Bridge Of Spirits: Corrupt Rot God final boss fight (Master difficulty)Watch on YouTube
Kena: Bridge Of Spirits: Corrupt Rot God final boss fight (Master difficulty)

Corrupt Rot God boss fight walkthrough
The final boss fight in Kena: Bridge Of Spirits is also likely the longest and most intense of them all. And the worst part is: you’re facing the Rot itself! Your friends and companions, turned sour! Oh, how dramatic!
The first and second phases of this fight involves targeting the corruption on the Rot Gods body, while the final phase involves waiting until he rears up, then targeting the spears in its back with your own Rot friends that you managed to snatch back onto your side from the previous two phases. And needless to say, try to dodge its massive swipe and laser beam attacks, because, well, they hurt.
It’s a long final fight, but well worth the effort when you finally do complete it!
So there you have it: all 16 boss fights in Kena: Bridge Of Spirits, with some context and a few tips on how to tackle each one. If you’re after more general advice on how to progress through the game, your best bet is to check out ourKena: Bridge Of Spirits tips and tricks. If you’re working on 100% completing the game, check out ourKena: Bridge Of Spirits achievements listfor some help, or let us help you hunt down all theKena: Bridge Of Spirits Spirit Mail.
